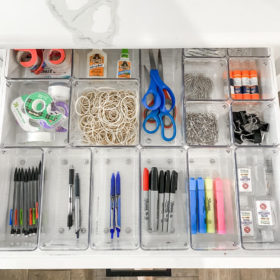


Before we jump in – Let me start this post with a disclaimer. This project is what pushed me to start this blog. With that being said, I utterly FAILED at documenting this process. The guide below is going to be super raw, super vague and the photo quality suuuuuuuuuucks. They are blurry. They are uneven. They make me cringe. If I could go back in time and say “yo you’re gonna want some good pictures because you’re going to be crazy and start a blog” trust me, I would. Please forgive me. I forever vow to try my best to do way better moving forward. But now that I have decided to do a blog, I want to at least outline for you guys the steps we took to accomplish this project.
Ok, ok, ok these built in bookshelves are my favorite project yet! It’s these guys that inspired me to start this very blog. These bad boys are so much more than just another DIY project. These bookshelves are my COVID-19, month 9 of quarantine love project y’all!
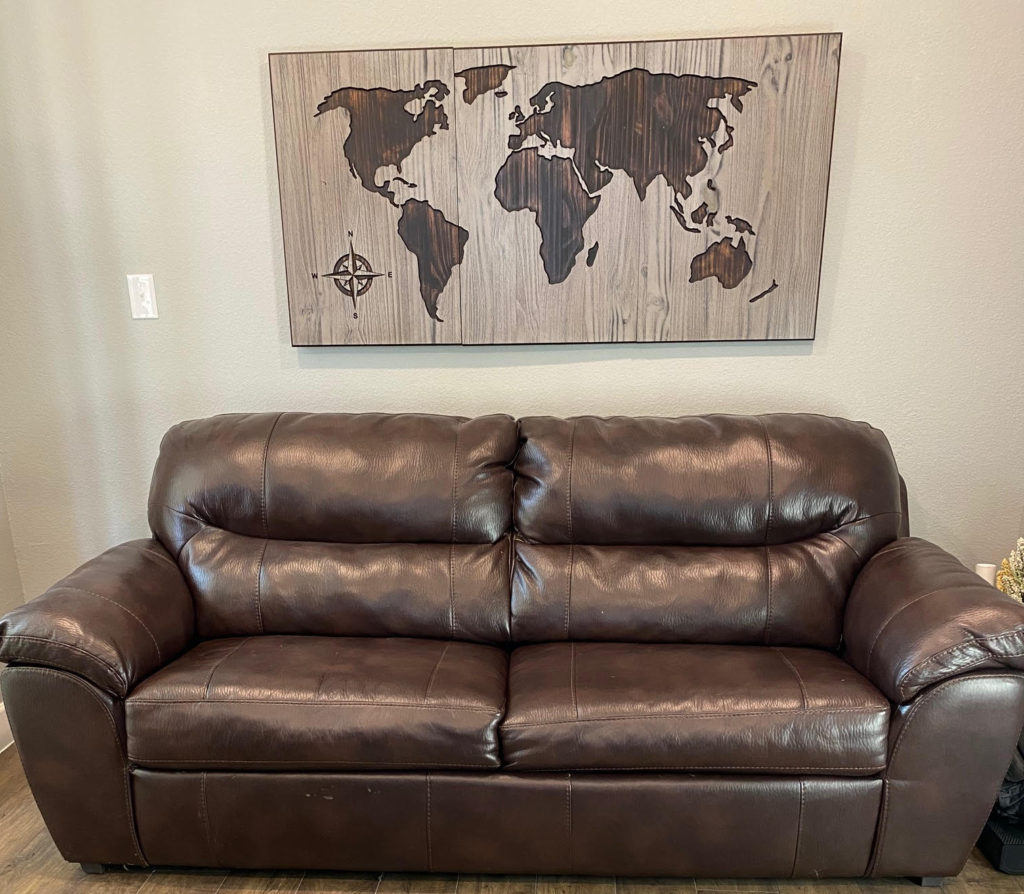
Real talk. We had Emerson right before COVID took over and I am so so sooo grateful for all of the extra time it provided me with our sweet Emmie. COVID drastically changed EVERYTHING. And with that, it changed my work structure. My job moved to be fully remote, and our home office had these awful dark walls, and this hideous brown leather couch. I just couldn’t take staring at it anymore. Throughout COVID, we did a few minor projects around the house and having these projects were 100% my outlet. So after hours of skimming built in book case tutorials – I thought “why not? hell yeah we can do this”. AND YOU CAN TOO.
SUPPLIES WE USED:
- 2×4’s to mount to the wall studs
- 2×6’s to build the base for the cabinets
- Project Source Unfinished Upper Cabinets (like these!)
- 2 Billy Bookcases (found here)
- 2×4’s to connect the Billy bookcases along the top
- 1X12 unfinished premium pine board
- Trim for the top & bottom to match existing
- Primed Shiplap
- Cabinet Screws
- Drill
- Miter Saw
- Power Sander
- Bar Clamps (like these, trust me – you need these to keep everything flush)
- Level
- Caulk (ALL OF IT)
- Speed Square
- Cabinet Hardware
- Paint – I used paint and primer, same color to match all of our interior cabinets in the house (PPG Pegasus)X
Here’s a look at the before. Isn’t she cute? HA.
Ahead of us deciding to plunge forward with this project, we got a quote from a local cabinet maker. Just for unfinished cabinets, not installed, it was going to be $4,000. oh and a 3 month lead time. That’s when this projects fate was sealed. $4,000 for unfinished cabinets was cute, especially when we could pick up unfinished cabinets like these at Lowe’s for 80 bucks each. Based on the dimensions of our office and where our French doors fit, we actually utilized upper cabinets for this project. However Project source has a ton of different cabinet options so you can find what’s best for your space.
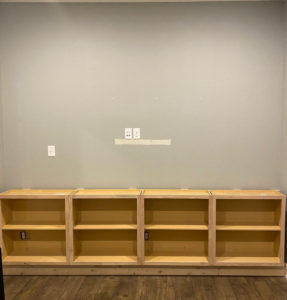
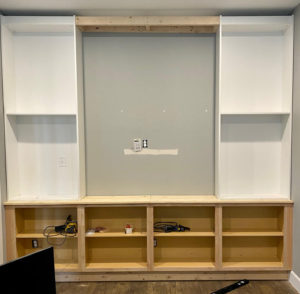
Since we went with upper cabinets, our first step was to build out the base that these fellas would rest on. We also knew that we would need to secure these not just to the base, but to the backwall somehow. For both of these steps we used our 2×4’s. First we drilled them directly into each stud along the back wall and then attached our base to that.
![]()
Once we finished securing our base, we secured the unfinished cabinets. The most important part here is to ensure they are level. No house is perfect. Our house is only 3 years old and it doesn’t even have level floors. To help us out here, we just used some shims where needed until we were level and rocking and rolling. Use your clamps to secure and keep the fronts flush.
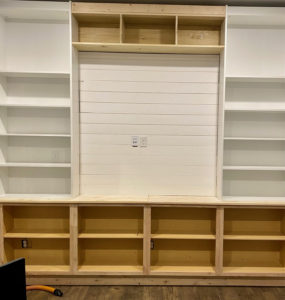
Next it’s time for our real short cut. This project may be titled DIY Built-In bookcases, but it should really be, DIY Built-In bookcases with a little help from our friend IKEA. Once we got the cabinets in – we were a bit overwhelmed at the thought of building bookshelves from scratch. Enter the Billy Bookcase. These lovelies are $49 a piece. SAY WHHHHHHHHAT.
We purchased two of these and partially assembled (with the exception of all the shelves). And on they went.
To give this project the finished out look, we knew we would have to build a shelf for across the top so for this purpose, you will notice we framed out the top to connect the two bookcases.
We used X & X to build out the top middle shelf. Building this ourselves allowed us the flexibility to customize the dimensions to our project. Once the top shelf was installed, the frame really started coming together. A quick shiplap on the inside area and here’s where we are at.
At this point, you could say we were about 75% done. So obviously, this called for about a month long break. What’s a DIY project if you don’t leave it unfinished for a good while?
Truly, the final steps were adding a trim piece, caulking & painting. For the trim, we matched our current baseboards to a board at Lowe’s and used Liquid Nails to attach. The key to getting our built in look was caulking every single seam. every single bookshelf hole, LITERALLY EVERYTHING. Once every hole is filled, wiped & sanded, it’s time to paint. When I type Voila – it’s going to seem like this step is so easy and UNREAL. But let’s not underestimate the amount of caulking that’s done. And the amount of painting. These tasks are tedious. But I love them so much. Find you a good playlist. Put the baby to bed. and Jam out.
AND VOILA.
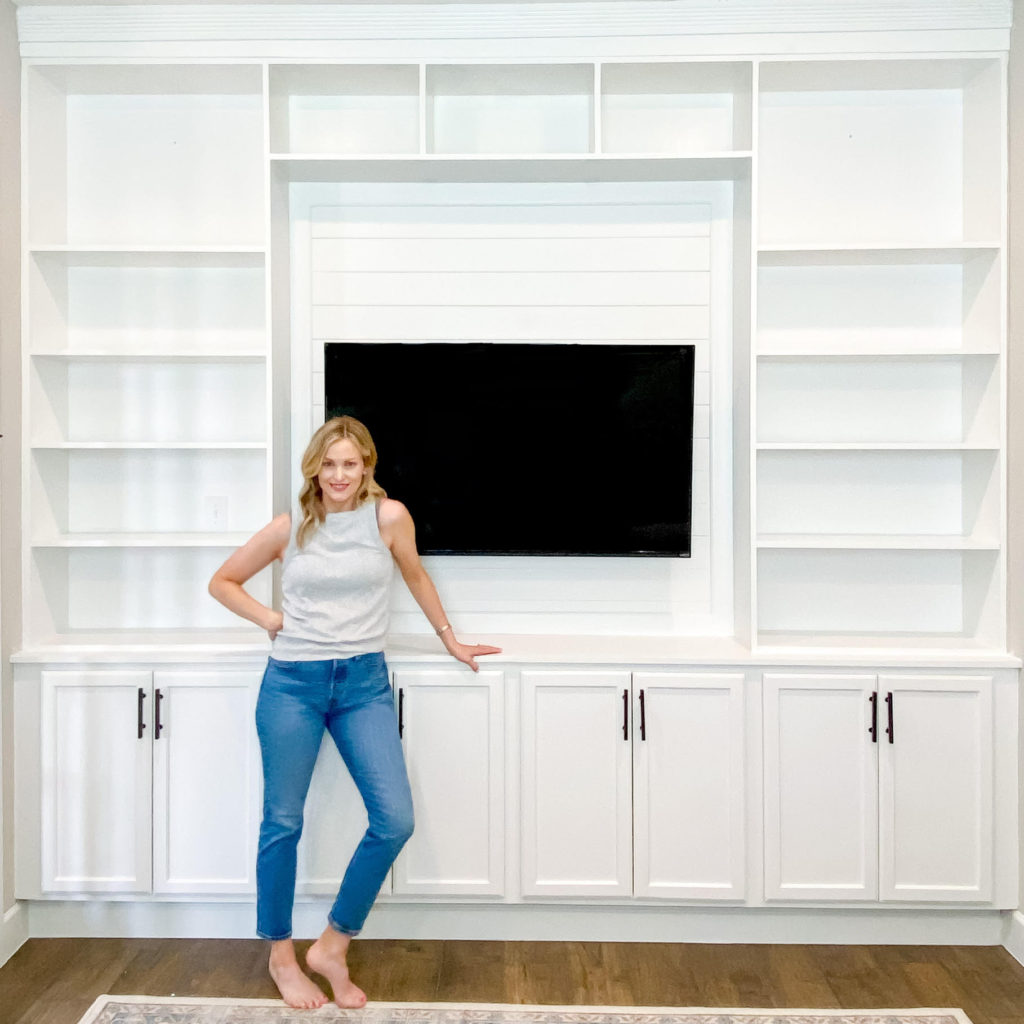
Getting the built-in look is seriously that easy yall. Now, I know this is not a true step by step project. Again, it was these bookshelves that inspired me to start this blog (after the fact of atually completing the project). For this reason, i absolutely failed at documenting every single step. If I could go back in time, I would force myself to take clear pictures of each and every step – detail out every little bit for you guys. I promise to get better about this moving forward and want to be just as helpful for anyone looking to start this project as all the blogs I referenced were for me. For any project on my blog. In the meantime, feel free to shoot me a comment below or on my Instagram and I’ll do my best to help you.
Have fun!